i should be mopping the floor: Search results for red velvet
Homepage Projects and Crafts Free Fonts Free Printables and SVG Files Printables Journals and Planners Facebook Covers and Device Wallpapers Fall Projects and Printables


Showing posts sorted by date for query red velvet. Sort by relevance Show all posts

21 Free Feminine and Girly Fonts

These 21 Free Feminine and Girly Fonts will make you want to put on your prettiest dress and kick up your heels! They're fun and frilly...with a few structured options, as well. These girly fonts are perfect on your own printables, projects, crafts, and vinyl creations. Download your favorite of these 21 free feminine and girly fonts below.
Girly Fonts
While I'm not 100% sure there is an exact formula for creating a more feminine font, I have definitely noticed that a lot of my personal favorite fonts seem to lean that way. Whether it's extra swirly glyphs on the ends of letters, or a sleek and slim structure, the overall vibe of these fonts is definitely on the girly side. And, they're a blast to play around with, too (especially for invitations and such). I've included my best tips for pairing a number of these fonts together for an even more eye-pleasing result.

Pumpkin Crafts at Inspiration Monday

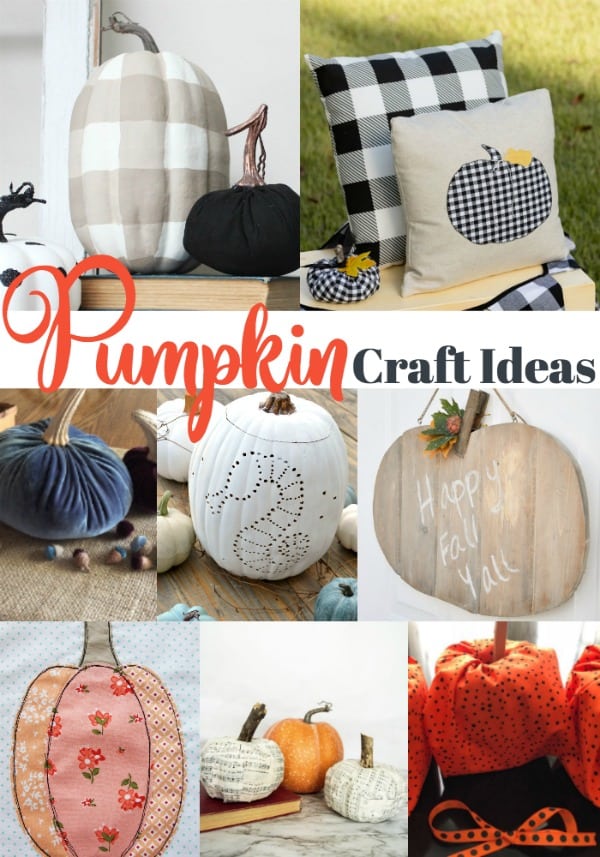
Now that it's officially fall, it's safe to break out the pumpkin crafts, right? From painted pumpkins to drilled out gourds, today's pumpkin crafts features are sure to inspire you to grab yourself a big pumpkin next time you're out. Check out these features and link up your own inspiration below.

Today, we're featuring everyone's favorite fall gourd: the beloved pumpkin. It's definitely the season for pumpkin crafts and these will have you plugging in your glue gun lickety split!

Pumpkin Craft ideas

These pumpkin crafts were chosen by Debbie from Refresh Restyle as this week's features. Check them all out below. But, kindly remember to pin from the original source.

Fall Dining Table Decor Ideas

This post for fall dining table decor ideas contains affiliate links. I make a small portion when these links are used, at no additional cost to you. 

My fall dining table is a bit on the au naturel side this year. The majority of the items used were from the produce department at the store...and my backyard. Hoping you enjoy these simple fall dining table decor ideas.
Natural Fall Tablescape
This week, I've partnered with loads of my favorite home decor bloggers in a lovely fall blog hop. I signed up for the fall dining table decor ideas portion of the hop...I'm delighted to share my dining room (in all her autumnal glory) with you today. Several others are also sharing their beautiful fall tablescapes, too. Check it all out below.

Envelope Pom Pom Pillow Tutorial

This Envelope Pom Pom Pillow Tutorial contains affiliate links. I make a small portion when these links are used, at no additional cost to you.

This Envelope Pom Pom Pillow is pretty much my favorite thing ever...the pom pom trim just makes it super happy! And this was actually really simple to make...just a little patience required. See the entire Envelope Pom Pom Pillow tutorial below.

Pom Pom Pillow
Last week, I shared our new blue velvet slipcover we put on our IKEA sectional. I got a great deal of questions and comments regarding the pillows that are are on each end of this sectional. I made an envelope pom pom pillow for each end of the sofa to bring out that fun blue (and add a bit of whimsy with the fun pom pom trim). Check out how to make your own envelope pom pom pillow below.

How to Make Pom Pom Drapes

This post for Pom Pom Drapes contains affiliate links. 
I make a small portion off these links when they are used, at no additional cost to you.

Ready to have the cutest drapes, ever? These Pom Pom Drapes are guaranteed to create a smile. They make our breakfast area so cheerful. They were made from four tablecloths and were super easy on the budget. Check out how to make your own set of pom pom drapes below.
Pom Pom Drapes

I've been over in my parents' town a lot lately. Their Walmart seems to have a much better selection of Pioneer Woman goodies than ours. When I ran across these Pioneer Woman aqua buffalo check tablecloths, I went weak in the knees. I knew immediately I wanted to make them into drapery panels for our breakfast room. I loved the drop cloth ones that were in here previously, but the way they puddled on the floor, meant they attracted alllllll the dog hair. All. Of. It. 


So, we were ready for some ch-ch-ch-changes in this space. These bright and cheerful pom pom drapes were just the ticket. 

Inspiration Monday

Hey, friends! Welcome to the very last Inspiration Monday Party of 2016. We will be taking off Christmas and New Year's days this year, so we'll see you in the new year with loads of inspiring links and features! Hoping you all have a wonderful Christmas and happy new year. We are always so delighted to host you every week...this party wouldn't happen without all of the creative inspiration you provide us with week in and week out. Love and hugs to you and yours!! 
Inspiration Monday Party
Also wanted to share the coolest offer I'm working with Graphic Stock on!
This is the third year in a row I'm working with them and I love their illustrations.
If you click here and head to their site...
you can get an entire week of downloading graphics for free.
Just cancel after seven days and keep all of the free graphics, photos, and illustrations that you've downloaded. 

Annnnnd...we have loads of the SWEETEST inspiration for you today!
Check these yummies out:

Last week there were many treats that we just fell in love with. And who doesn't LOVE all of the amazing deliciousness that surrounds the holidays? 

This week's features were selected by Christy from Our Southern Home
Check them all out below.

Blending Christmas Decor Styles

Today's post for Blending Christmas Decor Styles is brought to you by Tree Classics.

I've been working in our front room blending Christmas decor styles from vintage to classic. 
Come check out how it all came together below.

Blending Christmas Decor Styles | Mixing Christmas decorations from years of collections can be tricky. Here's a few tips to make it work seamlessly.
My collection of Christmas decor can best be described as a whole lot of hodge podge, y'all. I have inherited a great deal of my Christmas decorations from relatives...and I love putting it all out because it reminds me of those special people. And I've also added to my decor over the years, as well. Trying to mix my vintage items with my recent (more classic) items I've acquired is always a fun little challenge. This year, I've added a beautiful new tree from Tree Classics, as well as ornaments and a skirt to my front room decor. I mixed my new items with a lot of goodies I already had before and I'm really happy with how it all came together. 

Inspiration Monday

Welcome to the Inspiration Monday party, friends! We've been up to our elbows in paint at the new place for the past week...if I never see another paintbrush again, it won't be too soon. Fingers crossed we move in within the next ten days. I'm so ready to not be in the transition phase, y'all. But, I will be posting my first post from the new house this week, y'all (hint: there's a fun giveaway involved for you, too!).
Now, let's turn this day into a FUN one with loads of inspiration! IT'S PARTY TIME!

The features this week were chosen by Meegan from What Meegan Makes.

Vintage Christmas Luncheon Ideas

This shop has been compensated by Collective Bias, Inc. and its advertiser. 
All opinions are mine alone. #MeAndMyTea #CollectiveBias

Put an eclectic spin on your holiday entertaining with these vintage Christmas luncheon ideas. They're a fun way to bring a casual touch to a tea party or luncheon for your friends and family. I've included free printable menu cards and tents to use at your own gathering.

Put an eclectic spin on your holiday entertaining with these vintage Christmas luncheon ideas. They're a fun way to bring a casual touch to a tea party or luncheon for your friends and family. Includes free printable menu cards, too.
Do you enjoy holiday entertaining? I love small things...like tea parties, luncheons, etc. This post has lots of fun ideas of those smaller affairs...with some easy, make-ahead tips and free printables, too. Check it all out below.

Inspiration Monday

Wowsa...only two weeks 'til the big day! How are we almost halfway through December? It's always such a busy month...I really look forward to the week of Christmas so we can slow down a bit and really enjoy the season and each other. Hope you can find some time to slow down a bit, too.


Inspiration Monday

Welcome, friends. It's time for Inspiration Monday!
We are all ready to BOWL you over with some SUPER INSPIRATION!

Super fun announcement: we had over 800 projects linked up to last week's party. How incredible is that? Thank you so much for taking the time to be here.

We are thoroughly inspired by you every week.
To search all of our features and faves, use hashtag #InspirationMonday,
and feel free to follow us all on social media via our blogs. When you link with us, you're always seen on all seven blogs...but only have to link up to one!

This weeks features were chosen by Julie from Redhead Can Decorate...

Inspiration Monday

Welcome back to the party, friends! I'm so happy you stopped by to party with us today. I've had a bit of a lazier weekend, but I'm certainly not complaining. It was one of those laundry, cleaning, laying around kind of weekends...but sometimes we all need those. My dad's coming over tomorrow to help me with a really cool new project...I can't wait to share it with you!

Need some inspiration? You’ve come to the right place! Check out all the fabulous and creative ideas below. Of course, if you are a blogger, link your latest creations and have your work seen on seven different blogs!


This week’s features were selected by Leigh Anne from Your Homebased Mom.

Red Velvet and Peppermint Pudding Poke Cake

According to my kids, this Red Velvet and Peppermint Pudding Poke Cake
tastes exactly like Christmas.
#HolidayDelight #IDelight

Red Velvet and Peppermint Pudding Poke Cake  | A taste of Christmas in every bite of this moist, rich cake...and its topped with a delicious cream cheese frosting.
I love a good poke cake. I think this is about the fourth one I've posted here in the last year or so.  They're just so versatile...and always moist and delicious. I always associate poke cakes with summer...since a lot of them are made with gelatin. But, I really wanted to come up with one that captured the yummy flavors of the holiday season. This one starts with red velvet cake as the base...and then has a white chocolate pudding that incorporates International Delight's Peppermint Chocolate Truffle Creamer in it. It soaks straight into the cake. It's then topped with a cream cheese frosting and chopped peppermint kiss candy. This cake is just all kinds of festive fabulous.

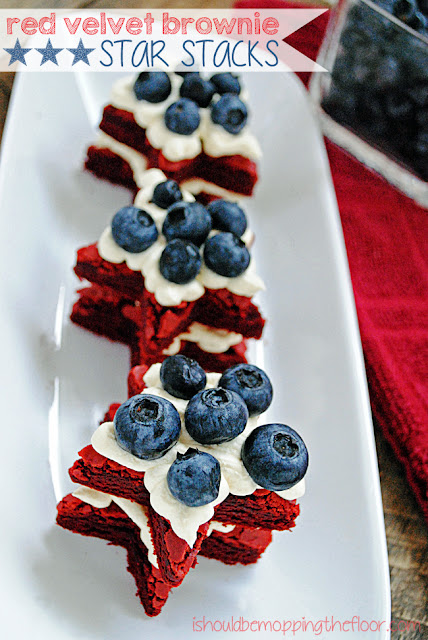
Red Velvet Brownie Star Stacks

This is an easy fourth of july dessert that will be a hit with your bunch.
The base is actually a cake mix brownie recipe.

Easy Red Velvet Brownies that start from a cake mix. Star shaped cookie cutters help make a cute patriotic dessert.
I love the fourth...or F-O-J as we call it around here. I put these brownie stacks together as an easy treat...that's also easy to transport. You can assemble at a picnic or even let your crowd assemble their own stacks. 

{It's now time to cue Neil Diamond singing America as background music in your head while you read this post}.


This starts with a cake mix {but you won't make it according the package instructions}. It also includes the cream cheese version of the Cool Whip frosting that I'm so enamored with right now. Enamored.

You'll Need:

- 1 box of red velvet cake mix {do not use the ingredient amounts on box}
- 1 large egg
- 1/4 cup water
- 3 TBSP canola oil
- 1 container Cool Whip Cream Cheese Frosting
- fresh blueberries

Easy Red Velvet Brownies that start from a cake mix. Star shaped cookie cutters help make a cute patriotic dessert.
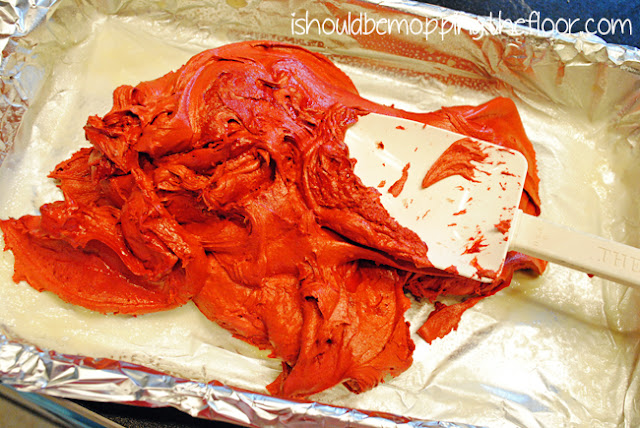
Combine cake mix with water, oil and egg. Stir to combine completely...it will be very thick. Spread into a prepared 9x9 pan. I like to cover my pan in foil and then spray it with the baking version of cooking spray {the kind that contains flour}. Also, I have a small 8x10 dish that I used above, only because my 9x9 was in the fridge with leftover corn casserole {leftovers in a 9x9 means nobody liked it}.

Bake at 350 for 25 minutes or until baked through. 

Easy Red Velvet Brownies that start from a cake mix. Star shaped cookie cutters help make a cute patriotic dessert.
Using a star-shaped cookie cutter, cut star shapes out of cooled brownies. {This is where that foil trick really comes in handy...just pull your cooled brownies out of the pan and peel the foil back. They're now super easy to cut}. 

Easy Red Velvet Brownies that start from a cake mix. Star shaped cookie cutters help make a cute patriotic dessert.
I put my frosting into a Ziploc bag and cut the tip off to pipe the frosting. Frosting brownies can be a bit crummy {pun intended}, so using a bag is a lot easier and less messy. I frost the "bottom" brownies first.

Easy Red Velvet Brownies that start from a cake mix. Star shaped cookie cutters help make a cute patriotic dessert.
Top with another brownie star. Then pipe more frosting onto the top. And add blueberries.

Easy Red Velvet Brownies that start from a cake mix. Star shaped cookie cutters help make a cute patriotic dessert.
I think they're super fun! My boys loved them. After devouring the brownies, we they used the excess brownie scraps and dipped them straight into the cream cheese frosting. We they think that's yummy.

Easy Red Velvet Brownies that start from a cake mix. Star shaped cookie cutters help make a cute patriotic dessert.

 To download the recipe card {prints in both 3x5 and 4x6 sizes}, click the image below:
recipe card

I just had to show you the below photo...it made me laugh {and maybe gag a bit...although, I promise that tub is clean}. My new favorite place to take pics is my bathtub. The light from that window is great...and it bounces off the mirror on the wall opposite of it. We took pictures of brownies in the bathtub. And then ate them with no apologies. 

I about went green with envy when I saw Donna's awesome photo studio that she has in her house. Photo Studio|Bathtub...Potato|PotAHto.

Keeping. It. Real.
Easy Red Velvet Brownies that start from a cake mix. Star shaped cookie cutters help make a cute patriotic dessert.


Neglect your chores like me and don't miss a thing:


Over 20 Poke Cake Recipes

Looking for an easy poke cake recipe to wow your friends?
We're got you covered.

I was recently asked by a fabulous reader what a poke cake was. That got me chatting with a few of my bloggy friends out there and we're thrilled to share the idea behind a poke cake with you. The basic gist is that it's a regular cake {often, a box mix}, that has baked and cooled. It is then poked with holes all over its surface. Then the holes are filled with something seriously yummy to make it super moist and crazy yummy. The filling can range from Jell-O to pudding to the original poke cake favorite, sweetened condensed milk. I know another blogger is wanting to do a post over the ins and outs of poke cake, so I won't go into too much more detail, but you get the idea.

My friends were also AWESOME to share some of their poke cake goodness for this crazy-yummy Poke Cake Palooza. {Please pin from the original source}.

This post is just getting started, friends. Click through for all the yummy recipes>>>

Gallery Wall Reveal {with tips and tricks for layouts, hanging, photos and more}

I finished our gallery wall and am really happy with the way it turned out. It's a simple gallery wall. I just used some tricks from my newspaper designing days to help me lay this baby out.

I'm a photo nut. Memory keeper. Mama-Razzi. I just love capturing moments that we can look back on and remember exactly what we felt/acted/did that day. I've been wanting to put together a gallery wall with some fuzzy feelings for quite some time. 

I picked up frames at both Ikea and Walmart and used some that I've had in the closet for years {the large one in the middle was put together by our photographer...I'm not sure where she ordered it from, but I can find out if you're interested}. It makes things easier to layout the design on the floor first. I snapped a phone photo and referred to it while I was hanging. 

The beauty of this wall is that it was fairly inexpensive. Some of the Walmart frames were as cheap as $3 each. But mixing them up with some nicer, "chunkier" frames and using my custom matte trick {explained below} helped them to look a bit more substantial and not so $3ish...{because let's face it, a $3 frame can look just like...well, a $3 frame}.  

Many of the cheap frames came with mats that I was able to dress up a bit. I did a post on this last year here {yes, that's exactly how long I've been planning this thing. Just taking my sweet time with it}. Looking back, I do think it's a little weird that I did an entire post on painting mats. Seriously, friends, thanks for sticking with me...even when I posted every little insignificant thing I was doing {today, I had cereal and a banana...what? You missed that post?}. I pray I've grown as a blogger since those days.

Keeping the mats all the same color {this color from Folk Art is called Sky Blue} helps tremendously with cohesion...especially since I used several frame styles. 

The frames that weren't black instantly became black with my trusty spray paint.
Again, this added to the cohesive factor since I mismatched my frames.

DISCLAIMER: I'm not a photographer AT ALL {so, please be kind if you think my lighting stinks or that I need a clue about my settings, you're probably correct}. I've taken a couple of photography sessions and refer to Kristen Duke's book *almost* daily. But I'm just recently branching out of AUTO mode on a regular basis on my DSLR. And most of the photos in my gallery wall are from years ago...some from FILM and {gasp!} disposable cameras.
--

One other thing I did is totally my own taste and not all people are into it. But, I made sure all of my photos {except the professional ones} were in the same tones. I was going for a bit of a vintage look with this gallery wall. 

I can't tell you how much I ADORE The Coffee Shop Blog. I've followed her for eons...she's amazing. And has the most beautiful preset actions {that are FREE...I can't get over that} to download {it is nice to compensate her in Paypal which there is an option for on her site}. You can use her actions in both regular Photoshop and PSE. I'm showing you how I used the PSE versions today because I think PSE is a lot easier to use for most people {and it's super affordable if you're in the market for a simple photo editing program}.

The above photo is SOOC {Straight Out Of Camera}. I even left the chocolate frosting on his lip for you to see {he's definitely my kid}.

After cleaning up his mouth and then just ONE CLICK of an action {okay maybe two}, this is what happens with the Velvet Cream Action. Truthfully, I sometimes run two actions on photos...I always, ALWAYS use her 2020 Action and then if I'm feeling extra naughty, I'll throw a cool vintage action on top of the 2020 {like the Velvet Cream}. {FYI, you need to flatten in between actions}.

Some photo purists may balk at the vintage effects and all that. But, this just makes my heart go pitter patter. So creamy and dreamy. And flippin' EASY.

Here's a screenshot of the Velvet Cream action running in PSE 11 {it's WAY better than the previous versions of PSE...actions load lickety split. I pretty much download new ones weekly, so that's a good thing for me}. 
Let's not talk about the fact that from this screenshot, it's completely evident that I have over 9,000 emails in my in-box. I'm an e-hoarder, I tell ya. Drives the husband nuts. 

After printing my photos at Snap or Shutter-something-or-other {wink}, I prepped them and was ready to hang. I started with the biggie since it needed wall anchors to hang and would literally anchor the entire wall visually. Once it was in place, everything else would just flow around it. 

Honestly, it was on its lonesome for a few days before I got my rear in gear for the others. At one point, my youngest pointed out that it looked "nekkid" up there all by itself. Ahhh....a future designer, maybe? {Surely all future design enthusiasts say "nekkid" with a drawl}.

I laid out the rest of the wall using visual lines running throughout {I showed them with some red lines above...drawn in PSE after the fact}. Again, this is an old newspaper layout trick I used to use back in my newspaper designing days...but I think design is design and can be applied to all facets of life.  Keeping the edges and corners touching these "lines" creates a pleasing visual layout. If I were to have "floated" any of those frames in their own "areas" it would have broken up the cohesion. The "jagged" edges around the outsides of the layout aren't as "icky" as "trapped white space" would have been within the layout. 

Also, I worked hard to keep the layout really tight. All of my "lines" and space between frames are about an inch thick. Anything much more than that and cohesion breaks and things aren't as connected to each other. 

If you read all of the above and don't think I'm a complete OCD nut, God bless you. 

I really do plan to add a lot more photos to this gallery wall as well as one that will be on the opposite wall in this hallway {I plan to do that one in white frames with the same "Sky Blue" mattes...because I'm cray-cray like that}. It will have more extended family photos that are sitting here in a stack on my desk glaring at me with cutting eyes for not using them in this layout. Cray-cray, I tell ya.

Love the peeps in these pics.
Favorite pic {hands down} is the one of them on the bottom right in their dirty undershirts on the grody dog house wearing 1980s sunglasses. That was life as we knew it five years ago. Perfection.


Neglect your chores like me and don't miss a thing:


The Tuesday Ten


Welcome to The Tuesday Ten! I feature my personal top ten favorites from the previous day's party every Tuesday. The readers' favorite links will be featured at the next party. If you haven't had a chance to link up to this week's Mop It Up Monday, you can still get in on the party action here!

{{CONTINUED AFTER THE JUMP}}>>>