


My sweet friend and contributor, Rita, is here today! I was blessed to get to meet and spend some time with Rita last month in Salt Lake City! She is an absolute GEM! She has a super cute {as always} project for us today: A DIY Appreciation Bouquet!

Hi again, it is Rita from Pink Polka Dot Creations.
I have been busy getting a new face lift, (well my site has, not me) and I would love if you have a minute and could come on over and tell me what you think!
Today I have a great project just in time for Mothers Day, but this is a fun one that could be for several different occasions such as Birthdays, Teacher Appreciation, Graduation, Baby or Wedding Showers, Just Because, or just for a cute Thank You gift! It is a cute spin on an old project!

This fabric covered terra cotta pot is so fun to make because there are so many darling fabrics out there and you can personalize your pot to any color or design that you want!
These are super easy to make and there is no sewing involved!
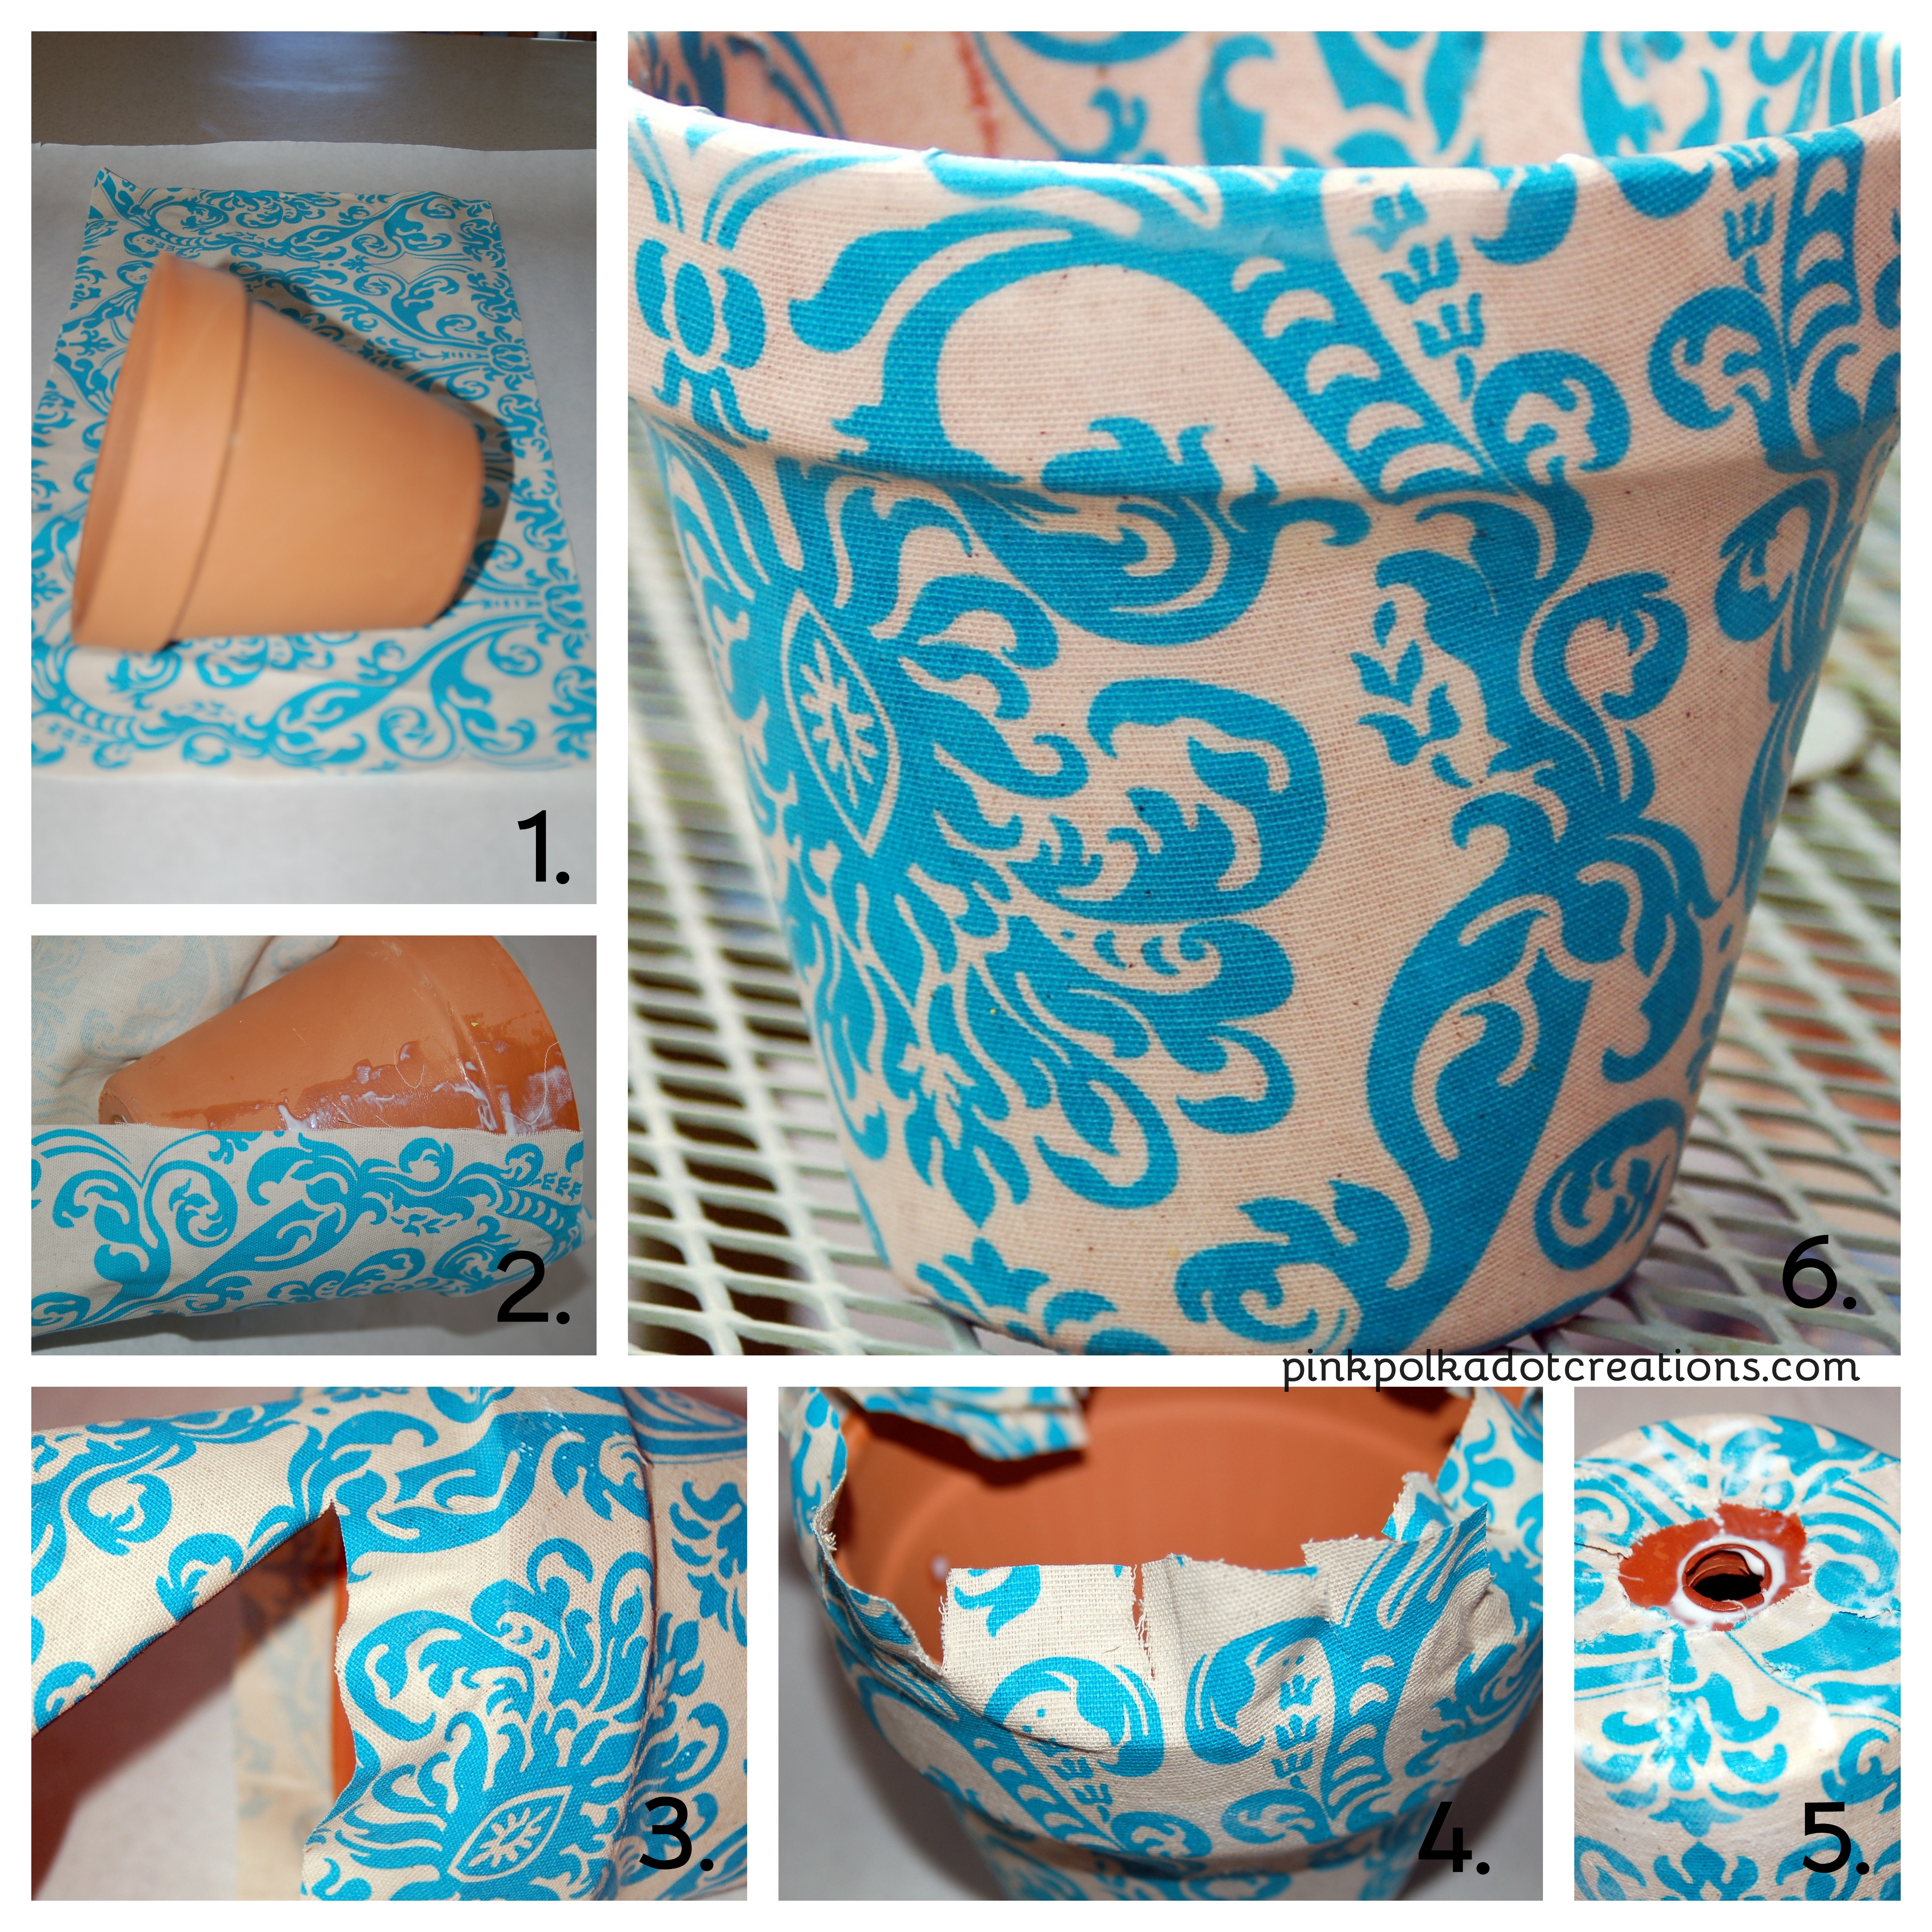
1. Find the size of pot that you want to make. Cut your fabric so that it is about 2.5 inches wider on both the top and the bottom, so 5 total inches wider and long enough to wrap around the widest part of your pot.
2. Using Mod Podge, put a layer of glue on the pot and start laying your fabric down. You will want the fabric to be on an angle when you start, with more of the fabric at the bottom of the pot. This allows for the angle on the pot. Add the Mod Podge all the way around the pot, rubbing your fabric flat as you go. Be sure to rub it down good under the lip of the pot.
3. Trim off the excess fabric from the top and the bottom. You will just want to cut about 2 inches away from the edge of the pot.
4. Clip the fabric on the top and the bottom, so that it will lay smooth. Apply a layer of Mod Podge to the inside of the pot and smooth your fabric over the rim.
5. Do the same for the bottom, being careful not to cover the drainage hole.
6. Add 2-3 more coats of Mod Podge over the entire pot to protect it. If you are going to use this outdoors, I would add 1-2 coats of varnish to the outside to protect it even more. Just be careful not to get varnish on the inside if you are going to be planting a live plant in it. Varnish or spray paint will kill your plants if they come in contact with each other.
So there you have a fun Fabric Flower Pot. This by itself, would be a darling gift...just add a potted plant and some gardening gloves or tools and you would be good to go!
Or you could make it into a candy bouquet like I did. Who wouldn't love to receive this?
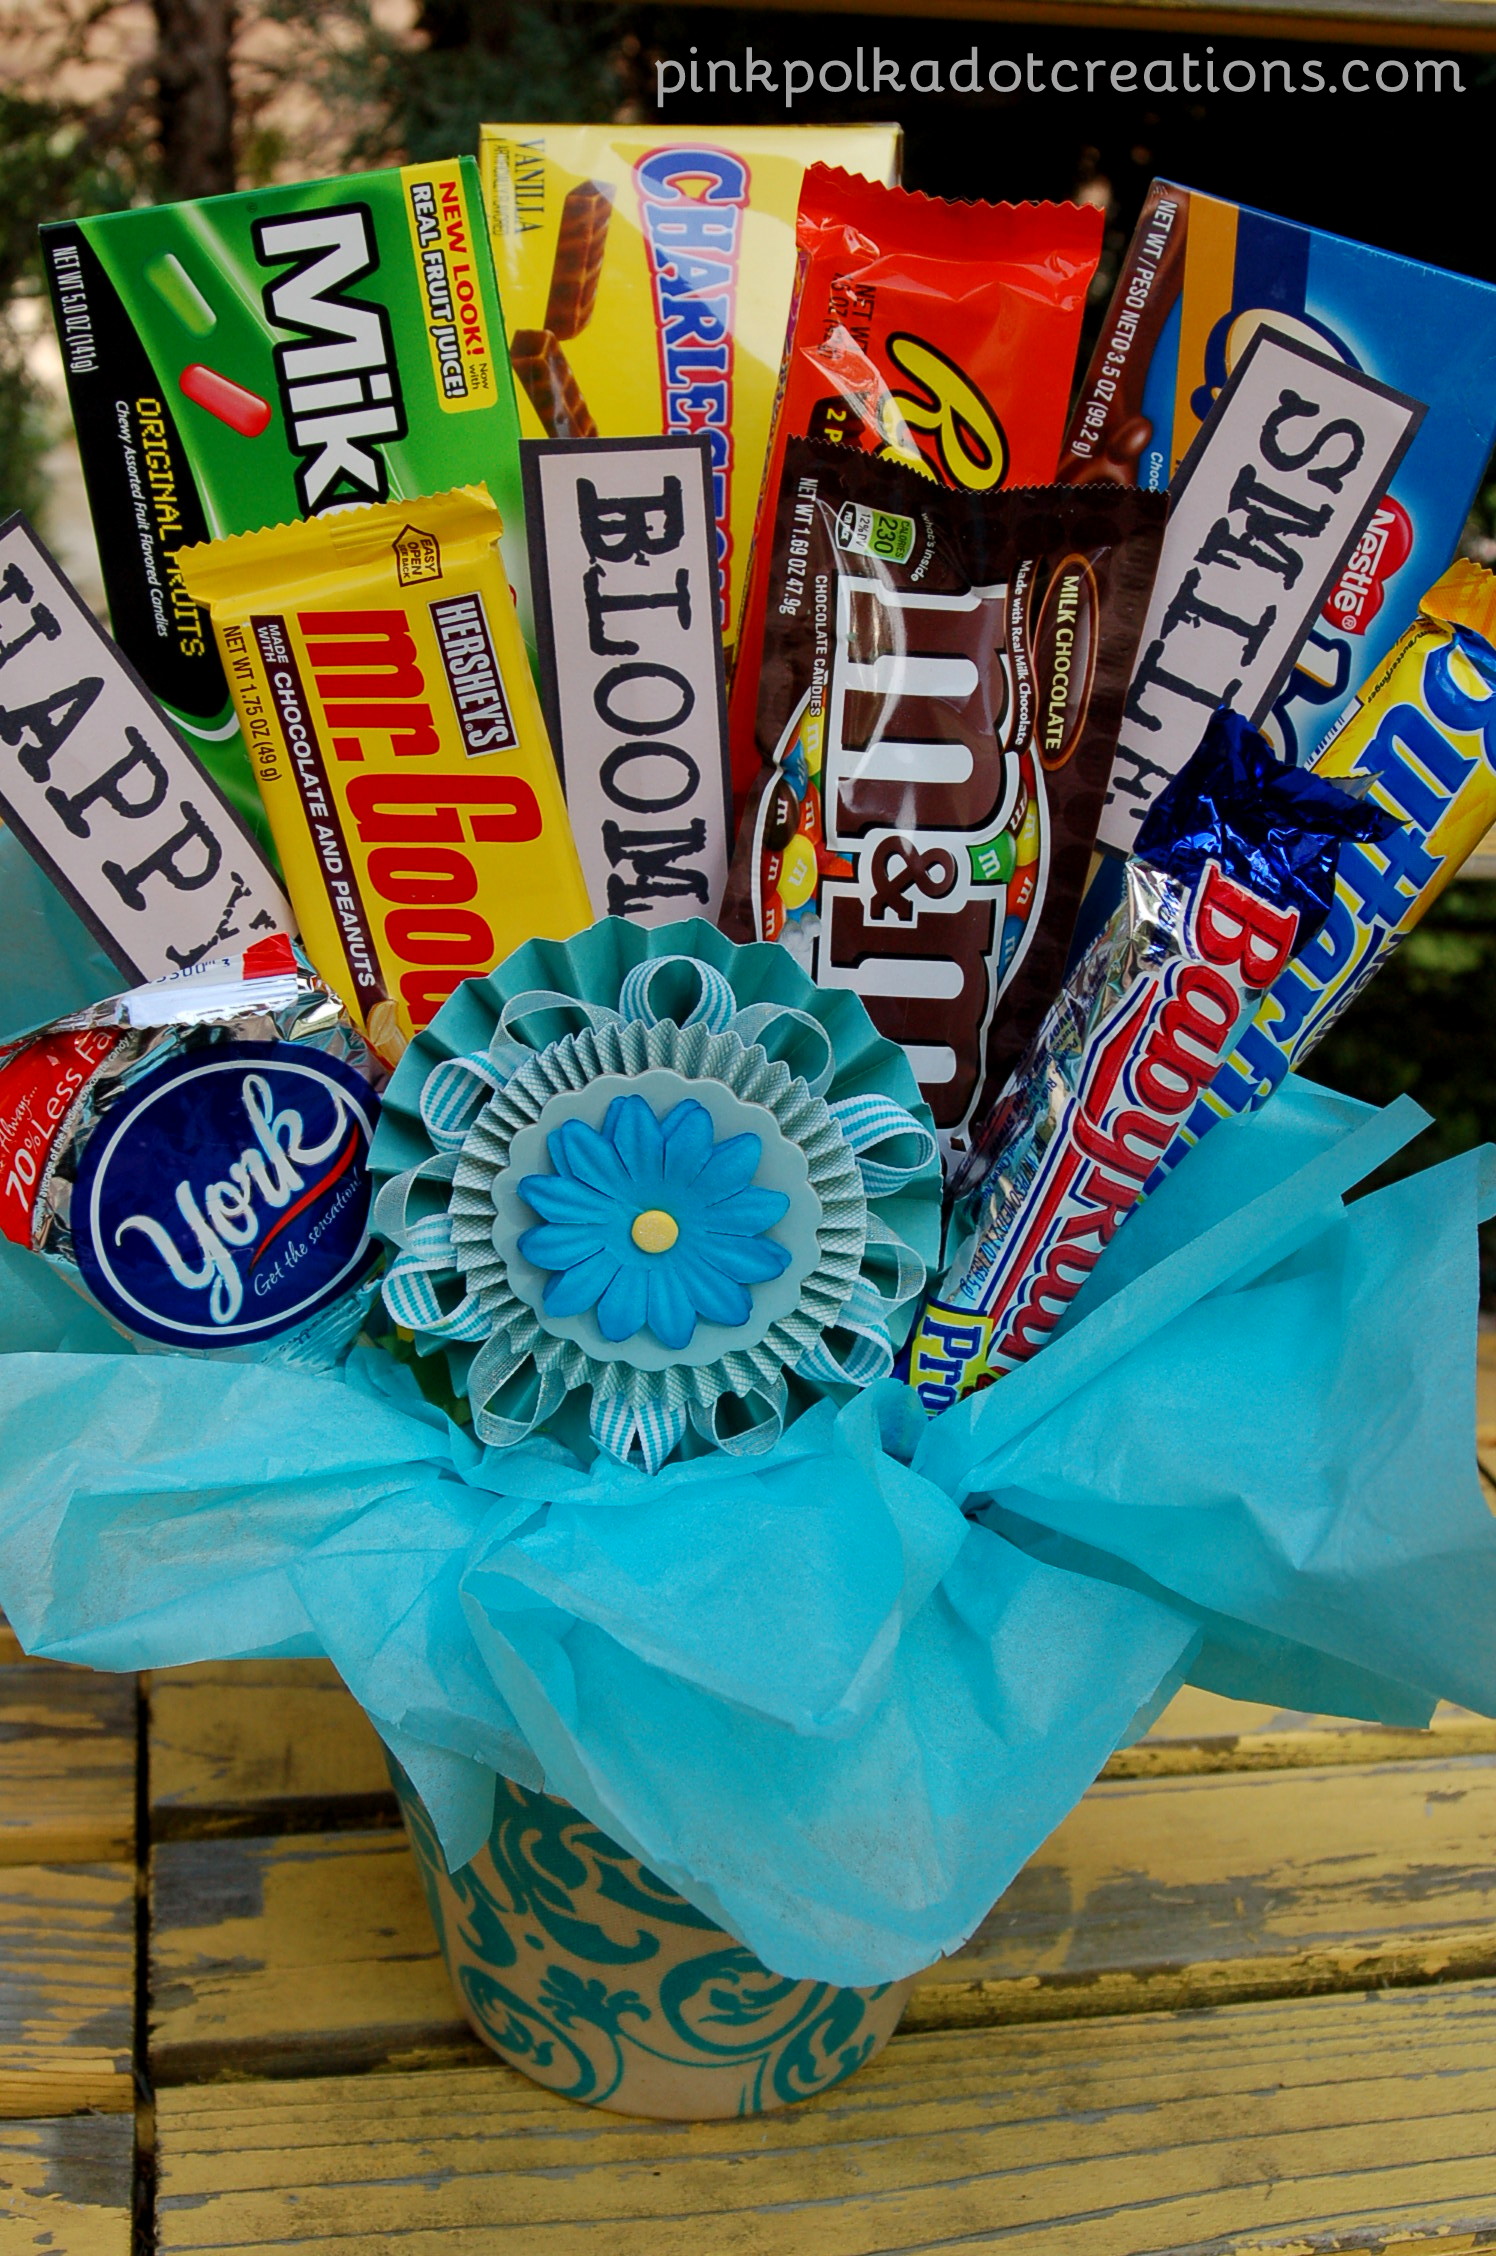
Just hot glue some candy to bamboo skewers and put floral styrofoam in the bottom of your pot with some tissue paper tucked in all around the edges. Make your "bouquet" and then tuck in some word plant pokes, a fun "lollie" or glue a gift card to a skewer and tuck it down in front! If you would like to make your own "lollies" check out this tutorial here, there is a link in that post with step by step instructions!
So now you have another fun gift!
I have included my printable plant picks here:
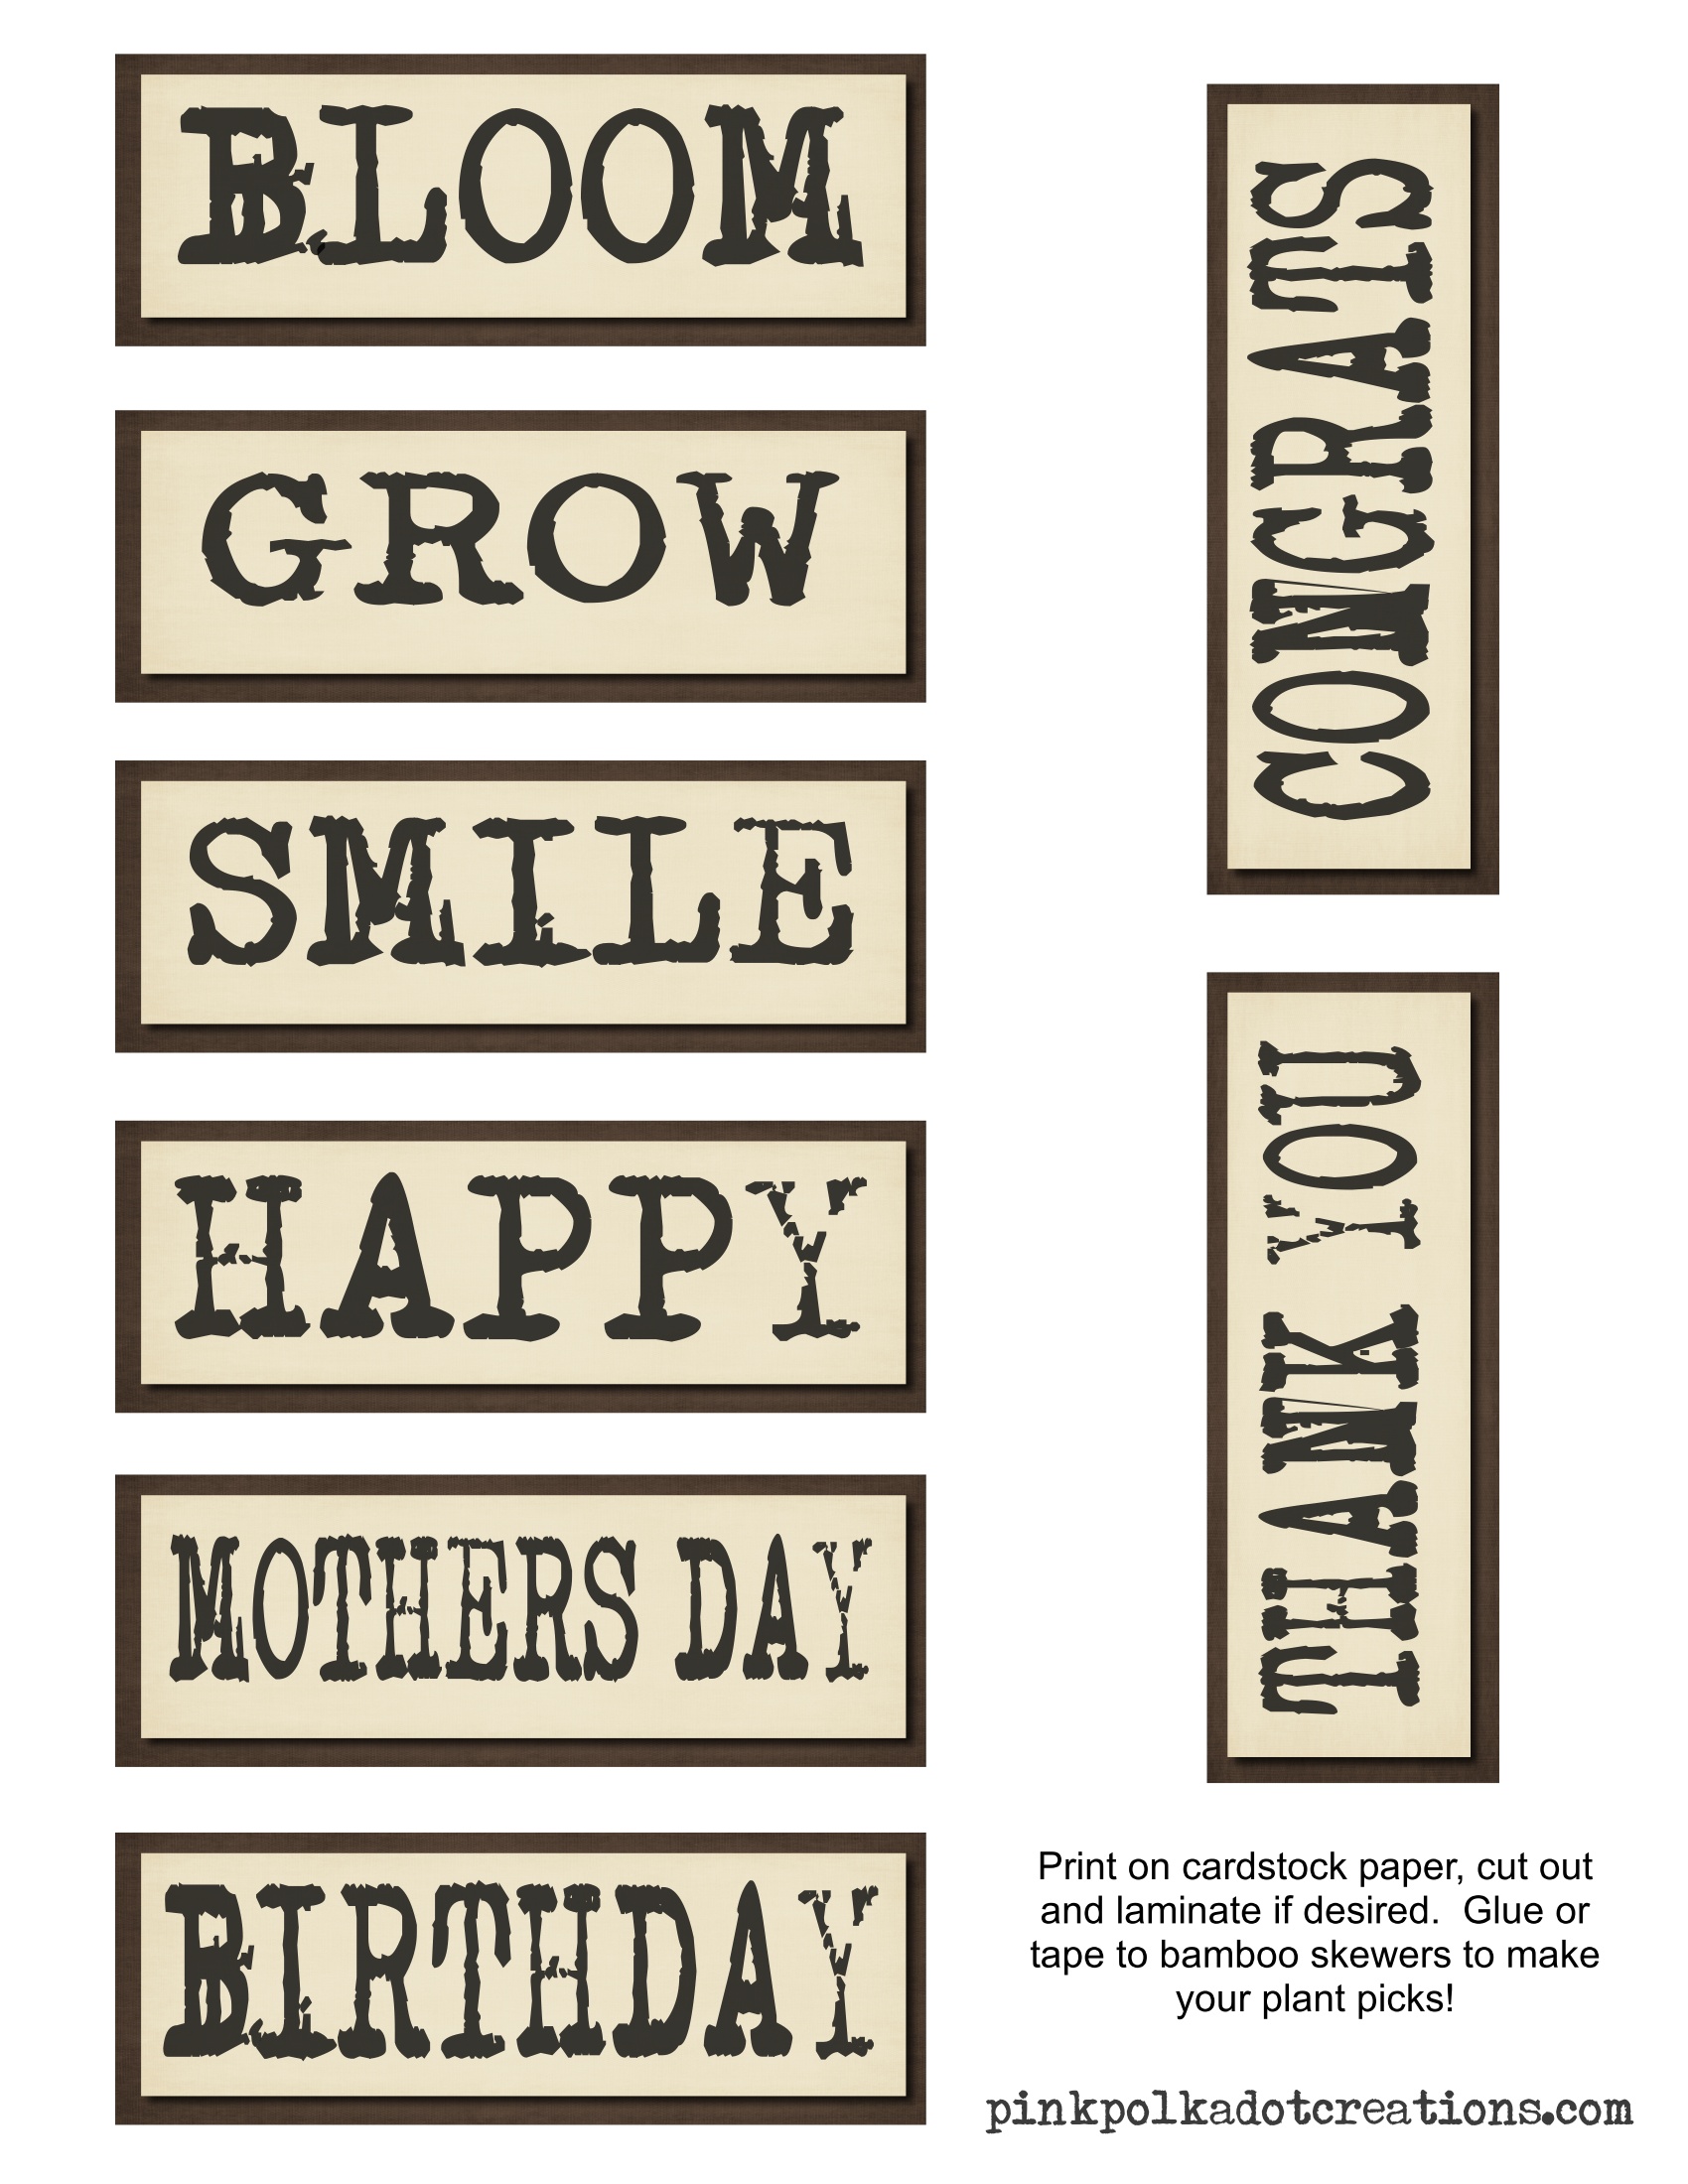
Just click on this link to download, Plant sticks.
With all the holidays, weddings, graduations and teacher appreciations coming up, I hope that you can use this idea to fill some of your gift giving needs!
I would love to have you visit me at Pink Polka Dot Creations,
or follow me on Facebook, Pinterest, or Instagram.
Thanks for visiting today, and thanks goes to Kristi for letting me join you here at I Should Be Mopping the Floor today. She is the best! I got to meet Kristi in SLC and it felt like we were old friends right from the start! :) It was so fun.
LOVE! So cute, Rita! thanks for sharing - I think this will be a special treat for some preschool teachers I know :) xx, b
ReplyDeleteSo very cute! Thanks so much...I'm pinning for later in the month :-)
ReplyDeleteHi there! You are so very welcome! I'm so glad you like it!
Delete