This post for a DIY Window Box contains affiliate links. I make a small portion when these links are used, at no additional cost to you.
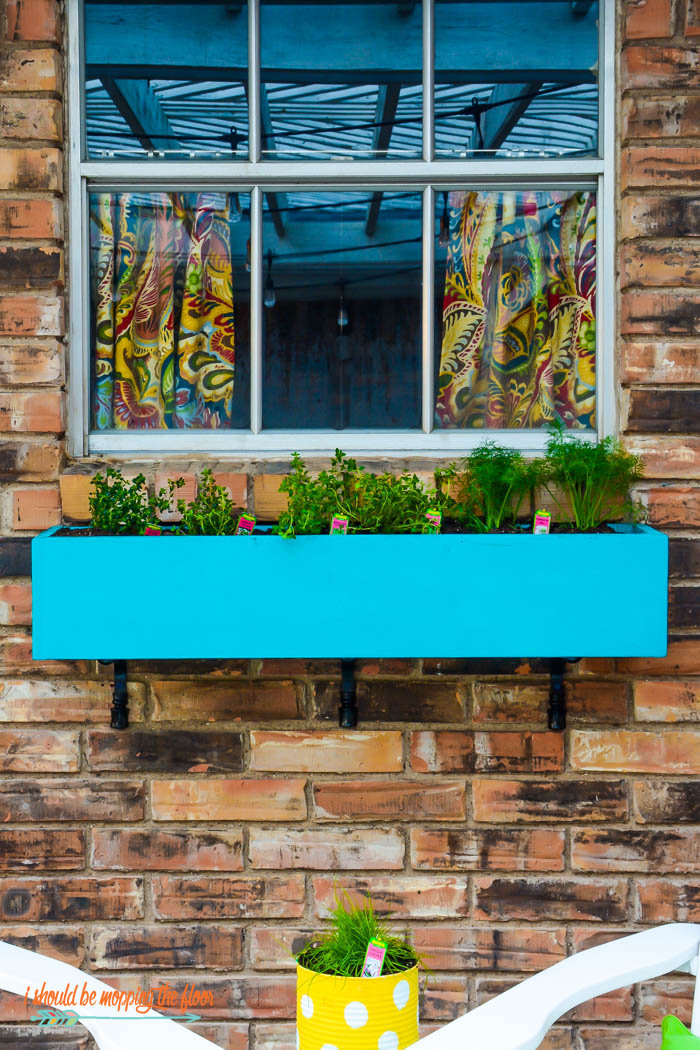
We've been dreaming of building window boxes for years. This little area of our patio was in desperate need of attention...plus, our existing herb garden is ready to expand. So DIY window box + fresh herbs = the perfect lil' window box herb garden. We're now wanting a hundred more DIY window boxes...they're addicting.
We have this random window on our patio that actually goes to a store room in our garage. It's kind of a focal point...but into a weird place. I made a little cafe curtain for the window (to mask the storage factor of this room that was very visible) and then realized that maybe a bit more color and fun is what the spot needed. And why not throw a little functionality in, to boot? We've been thinking about window planter boxes in a few spots for a while, and this quickly became a no-brainer. Plus...we love fresh herbs. This is the perfect spot for a DIY Window Box Herb Garden. But, window planters would also be lovely on the front of the home, too, adding lots of charm and curb appeal. See how these flower boxes came together below with this easy DIY project.

How To Build a DIY Window Box
Our house is full of long windows...the type that go from the floor to the ceiling. But there are a handful of windows that don't...and they've been crying out for window boxes. Now that we've tackled this one, we feel pretty confident that the other windows are ready to be prettied up, too. And since this one is so close to the kitchen, it was only natural to fill it up with herbs. We have already put this herb garden to use for soups and salads...and it's proving to be delicious.
Supplies for a DIY Window Box
Ready to build your Window Box Planter? You'll need a few supplies:
- 2-1"x10" boards in 8' lengths (treated boards are best, but may not always be available in that size...we used untreated and then coated them later)
- nails
- wood glue
- nails (we also found a nail gun to make quick work of this)
- medium grit sandpaper
- outdoor paint/marine grade sealer
- paint brush
- 3 shelf brackets (check the weight limit before buying...our brackets are designed to hold 70 pounds apiece, or 210 pounds, altogether)
- masonry anchors or screws (if securing your window boxes into brick)
- drill or driver (if using masonry screws, you'll need a hammer drill)
- saw or compound miter saw
- potting mix
- plants
Instructions for Your DIY Window Box
- We started by cutting three of our 1x10 boards to the length of our window (36"). You'll need to cut your pieces according to your window's measurements.
- After our three boards were cut, we did a dry fit to determine the length of our two end pieces, and then cut those accordingly.
- We secured the pieces with wood glue. You can also add clamps here while the wood glue dries, if desired. We didn't, but it certainly would be an added measure for strength.
- We immediately followed with the nail gun. We drove a nail about every three inches where we joined the pieces together.
- We repeated the process on the end pieces, too.
- After allowing the wood glue to dry overnight, we filled the nail holes with wood filler (we had set our nail gun to sink the holes for a seamless finish...if you're doing this by hand, use an awl to drive the nail head below the wood's surface).
- After the filler dries, sand the entire piece for a nice, smooth finish.
- I painted the box with an exterior paint and sealed it with a marine grade sealer (since this box will definitely be exposed to the elements). You can skip the sealer if you're going for a more rustic look and want the box to age naturally over time.
- I didn't paint the entire inside of the box, but I did seal the inside thoroughly. If you prefer, you could even staple in a liner for extra help against excess water.
- If you'd like to add a primer prior to painting, you certainly can.
- We attached our brackets to the brick with masonry screws. We predrilled these pilot holes with a hammer drill and masonry drill bit ahead of time. Again, be sure to watch the weight limits on your brackets (ours hold 70 pounds apiece and their depth matches the depth of our box, depending on the width of your box, you can add an additional bracket for weight purposes, if desired). This is a new masonry screw system we tried out...we used to use anchors into the mortar. However these new screws are designed to be used in the actual brick. So far, so good. UPDATE: They're still holding strong in 2022!
- Once we loaded our window box onto the brackets, we did not screw the brackets into the box...only because I'd like the option of bringing this window box into the sunroom in bad weather. But, you can totally attach yours, if you're more comfortable with that.
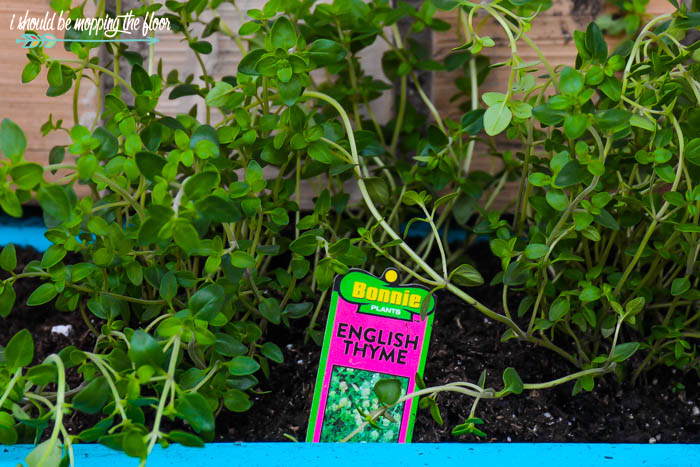
- We chose our favorite herbs for our window box. Once we have a few more window boxes, we plan to have every herb imaginable. This time around, we used Onion Chives, English Thyme, Lemon Thyme, Dill, and Basil. I fell in love with the Lemon Thyme we used in our Sunroom Herb Garden and wanted to have access to even more. It's delicious in two of my favorite soup recipes. And we use chives and dill in our eggs for breakfast.
- Before planting, be sure to drill adequate drainage holes in your window boxes. We used a larger drill bit for this, however, we have messed this up before on a previous project. When you drill holes, make sure they're not so big that you lose soil when you water (lesson learned).
- Besides sealing with the marine grade sealer, I didn't use any type of joint sealer within our window box. I wanted there to be plenty of drainage so we didn't run into any issues.
- Fill your box with your soil and start planting (if you're really worried about drainage, you can add a layer of gravel to the bottom of your planter before your soil goes in). I found it easier to plant on the ground and then slide the box into place on the brackets. Then water (don't water before lifting...it will be too heavy!).
- Be mindful of what you plant based on how much sun and shade your box will get.
Once the window box was planted, we slid it onto the brackets.
You can also see how we put this together, in the video below:

We used a couple of cans left over from our Tin Can Flower Garden for our overflow herbs (because, of course I bought too many.
And seriously...who doesn't love fresh chopped herbs in the kitchen?
I feed my herbs with fish emulsion. I also overwinter my thyme and oregano by bringing this DIY Window Box into my sunroom during cold snaps.
I wish you could smell how delicious this area is now!
And check out the update below of how much this box has grown in the last month! I think this little box adds so much life to our home's exterior.
The above photo shows how BIG our herbs our getting...it was taken about a month after we planted. We're truly LOVING this project and want a few more window boxes, now! Wishing I had a couple of windows on the front porch, too...wouldn't that be lovely?
Looking for More for DIY Window Box Tutorials?
- My good friend, Julie, over at Redhead Can Decorate has a great DIY Wood Window Box tutorial that is so pretty. I love the stain they used.
- And be sure to check out these pretty window boxes over at Jenny Steffens' blog.


I love how bright and cheerful that area looks!
ReplyDeleteThank you so much, Tiffany!
DeleteI love the window box. It is my favorite color. The hubby and I will be making a larger one for our kitchen window. Thanks for the inspiration!
ReplyDeleteThank you so much, Lynnann! Hope you enjoy yours, too!
DeleteArrange the flowers with the tallest in the back and shortest in the front. Depending how deep your box planters are, you may get two or three rows of flowers in. Pack them fairly tight, because you want the look to be overflowing.
ReplyDeleteThat is a great tip, Hannah! Thanks so much for sharing. I'll try that!
DeleteWow, it is such a useful step-by-step guide. Drilling adequate drainage holes is really really important. We will realize the importance after we water too much water then we should we one day. Otherwise we will face a severe drainage problem.
ReplyDeleteHi Steven! I'm so glad this guide was useful to you! Yes! Drainage is VERY important! It's not a step that should be missed. Thank you bunches for stopping by! Take care! xoxo
DeleteKristi, great post and step by step guide, I have one question - do you find the wood can rot eventually? Would lining the box help if that was the case? Thanks
ReplyDeleteHi Tim-- We've had this box in place for three years without any issue, but did know that could be an issue going in. My advice is to use treated lumber, if you're worried about that. Lining the box is another great option. But, the way this one is going so far, I can see it lasting at least 10 years. Thanks for stopping by.
Delete