i should be mopping the floor: July 2013
Homepage Projects and Crafts Free Fonts Free Printables and SVG Files Printables Journals and Planners Facebook Covers and Device Wallpapers Spring Projects and Printables


Vanilla Bean Mega Mocha Milkshake

This post is brought to you by Seattle's Best Coffee.

This Vanilla Bean Mega Mocha Milkshake 
is the perfect afternoon {or anytime} pick-me-up.

This is such an easy milkshake...guaranteed to, well, bring all the boys to your yard.

Recently Seattle's Best Coffee sent me a box of YUMMY...it included a few bags of these Frozen Coffee Blends to try out. They were an instant hit. 

To make these milkshakes, I used a bag of the blends, a couple of {BIG} scoops of Vanilla Bean ice cream, and vanilla creamer to get the consistency of the shake that I wanted {which for me was about half a cup}.

Pour everything into the blender and blend until desired consistency is achieved.

I also rimmed my glasses with honey followed by chocolate jimmies.

Super easy and yummy.

There's several flavors of the frozen coffee blends...
think of all the FUN possibilities!

And why not keep it simple sometimes, too? 
Simply blend the coffee with milk for a two-ingredient treat that tastes fantastic!

The first FIFTY readers to fill in the form below will be mailed a coupon for a free bag of Seattle's Best Frozen Coffee Blends! SCORE!

{50 ALREADY FILLED IN!!
GIVEAWAY DONE}


Neglect your chores like me and don't miss a thing:


Summer Fun in my Morning Coffee #IScream4ID

How is it almost August? We're trying our best to preserve what's left of the summer fun around here. Even momma's morning coffee has its own summery twist in the form of a delicious ice cream treat! 

Two Scoops of Summer in My Morning Coffee: Loving the new International Delight Coldstone Creamery Flavors #IScream4ID, @indelight,  #summer
The ultimate mash-up? Coffee and ice cream.
One scoop or two in your mug?

While my boys are enjoying their own summery ice cream treats, my cup is filled with caffeine and creamer. And not just any creamer...I'm totally digging the new International Delight Coldstone Creamery Flavors! My absolute favorite is the Hot for Cookie one. It really tastes like an honest to goodness hot cookie. Like, seriously. My coffee to creamer ratio is getting dangerously close to 1:1 these days. 
It's that good. 

Two Scoops of Summer in My Morning Coffee: Loving the new International Delight Coldstone Creamery Flavors #IScream4ID, @indelight,  #summer

Since it's hotter than hookus around here in Texas, it's fun to have friends drop by for coffee and treats after a hot day of play and work {when it's finally starting to cool off}. I'm thinking it would be WAY fun to throw an ice cream social one evening: frozen treats for the littles and International Delight Coldstone Creamery flavors for the adults' coffee cups. 

What would you need to throw the ultimate ice cream social?

International Delight's Pin to Win Sweeps #IScream4ID {ishouldbemoppingthefloor.com}

Love ice cream + coffee? This summer, International Delight is bringing your favorite Cold Stone Creamery ice cream flavors to coffee and they're celebrating by giving away five $400 grand prizes to throw this summer’s ultimate Ice Cream Social!  To enter, visit the ID + Ice Cream Pinterest board and pin your favorite image using the #IScream4ID hashtag. Good luck! 


Two Scoops of Summer in My Morning Coffee: Loving the new International Delight Coldstone Creamery Flavors #IScream4ID, @indelight,  #summer

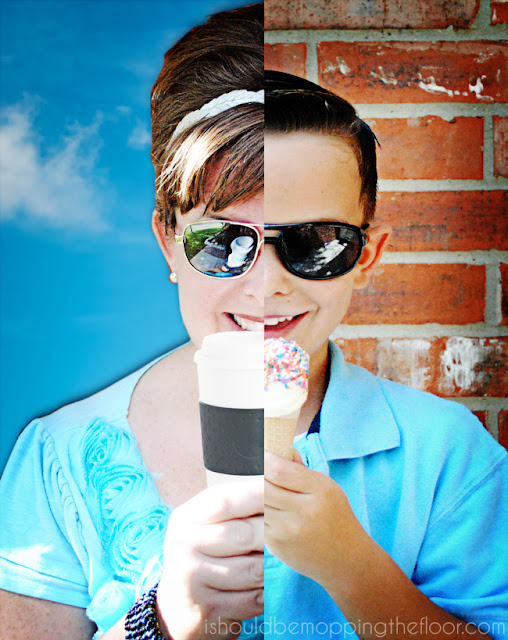
Our mashup photo shoot was super fun!
Thanks to my youngest son, Jonathan, for joining the fun with me.
 
This is a sponsored conversation written by me on behalf of International Delight. The opinions and text are all mine.


Free Printable Froggy Thank You Notes

These free printable fill-in-the-blank thank you notes are perfect 
for little ones to fill in the blanks. 

Free printable fill-in-the-blank thank you notes. Perfect for kiddos to fill in after birthdays or holidays. Choose from blue or pink. Instant download.

My boys have used fill-in-the-blank thank you notes for years. It makes it so nice after a birthday or the holidays to send off a lil' appreciation. These print two per letter-sized sheet, to be cut. Prints best on cardstock. 

Free printable fill-in-the-blank thank you notes. Perfect for kiddos to fill in after birthdays or holidays. Choose from blue or pink. Instant download.

Free printable fill-in-the-blank thank you notes. Perfect for kiddos to fill in after birthdays or holidays. Choose from blue or pink. Instant download.


Neglect your chores like me and don't miss a thing:


Beach Condo Tour

I love looking into other people's homes for inspiration.
This is the beach condo we enjoy staying in when we visit the shore.
The owners have decorated it beautifully and it's a great place to get away to.

Beach Condo Tour with lots of great decorating ideas.

I grew up spending a week {or sometimes more} at the beach with my family. We've started our own tradition of doing this with our boys as well. I want them to grow up with memories of sandy summers and lots of great family time.

Our favorite getaway spot every summer is Mustang Island...a Texas beach a few hours down the road from us. We stumbled onto this condominium complex a few years ago and always enjoy staying there {if you'd like the name of it and more details on renting this particular unit, just drop me at email}. I enjoy the "roll out of bed and walk down to the beach factor" as well as having all the comforts of home {like a kitchen, separate bedrooms, etc.} right there with me. 

I love how this condo is decorated. 
So beachy and relaxing.

Seriously wanted to take this coffee table home with me. 
This is just my style, y'all. Love.

This was my curl up and read spot after a day of play.
{My husband jokes that I may not get to read but one week a year, but when I do, I devour about five books in a row in that week. He's not even kind of kidding.}

Loved these chairs around the dining table.
And check out those hand-scraped floors? Perfect for tracking in all the sand and surf that seems to make it with you everywhere you go when you're on the beach.
{Photobombed by the hubs.}

Is that paneling around the bar area not gorgeous? Love it. Also love the mosaic subway-style tiled backsplash. 

really like cooking when we're on vacation. Some people aren't into that, but to me it's fun. We will cook or grill by the pool about half of the nights we're there and eat out the other half {seafood restaurants only at the beach}. One of the days we're there, we take a beach break and head into town to see the sites. On that day, we'll eat a big lunch in town and come back to the condo to make homemade ice cream for summer...that's one of my favorite vacation traditions. Although these kitchens come fully equipped, I do drag my ice cream maker all the way to the beach {it may or may not take us four hotel luggage carts just to unload our car when we arrive}.

Love the little half bath on the first floor. 
Look at that mosaic glass tiled wall! It sparkled. Sparkled.

The master bedroom upstairs was super spacious.

It had fun details, like this precious cross-stitched pillow.

And that capiz-style lamp? I die.
I'm a sucker for capiz anything.

The master bathroom was pretty awesome.
Once we got home, I contemplated taking a sledge hammer to ours.

Beautiful shower. It made me like glass block again...which I had given up on years ago. It also had another shower head on the wall to the right. It was a shower for two...but we could fit ten people in here, easily. Not that we did that. Just to be clear.

Pebble rock tile.

I liked how the lights were on front of the mirror.

The pebble tile extended along the bottom of the mirror area.

The second bedroom was cozy, but still pretty.
Love that the rattan from downstairs was carried upstairs, too.

Cute little bedside table.

The bath for the second bedroom had more fun rock tile...or whatever that's called. 
It was on the floor, too. 

This was the view from the balcony out of the master bedroom.
Perfection to sit here and enjoy a morning cup of coffee. My husband and I also sat out here nightly after everyone else was tucked in. It was beautiful to just watch the moon light up the ocean. The only thing you can hear at night here is the waves and crickets. Awesome.

{Oh, and those pools were pretty sah-weeet to enjoy, too.}

But, let's be honest.
This is what the beach is really all about.

What's YOUR favorite vacation tradition?


Neglect your chores like me and don't miss a thing:


My 25 Favorite Free Chalk Fonts

You guys know I love a good chalkboard free printable
Here are my go-to fonts for creating them, links to download included: 
{and two free chalkboard backgrounds}

25 Awesome FREE Chalk Fonts and 2 Chalkboard Backgrounds. Includes download links and examples.
I've been kind of amazed at the amount of emails and messages you sweet peeps have sent me about the chalk fonts I use. The truth of it is, I spend way too much time on font sites...looking for fun ones. I thought I'd share my absolute favorite free ones with you here. I've included the well known 'quick brown fox' line so you can see how every character looks in the font {upper and lower cases, when available}. Below the images are links for you to go and download them for your own font library.

Pamper Yourself: Pin to Win Giveaway


Who doesn't LOVE being pampered? 
Enter below to win one of the following {AMAZING} prizes:

1.Gorgeous Coach Purse {available in several colors}
2. $400 Visa Gift Card
3. A Michael Kors Watch and Matching Toggle Bracelet
4. A Tiffany & Co. Necklace 
{You get to pick which one you want!}
  

Pin it to Win it - Pamper Yourself! You pick the prize!

Step 1: Pin the image above.

Step 2: Follow all the bloggers listed below on Pinterest.

Image Map
Step 3: Enter using the Rafflecopter widget below. For additional entries, follow some awesome new blogs on Facebook!

DIY Chalkboard Backpack Station

This post for a DIY Backpack Station was sponsored by coupons.com. All ideas and opinions are mine.

Need a fun back to school projectA DIY Chalkboard Backpack Station is the perfect way to keep kids' school bags and important notes all in one spot.

DIY Chalkboard Frame and Backpack Station Tutorial
I've been so excited to show you guys one of the latest projects in our kitchen redo. This DIY Chalkboard Backpack Station is going to make things so much less fussy when school time rolls around. It's so nice to not have back packs on my kitchen chairs anymore!

Fun, Fresh and Flirty Banner Printable

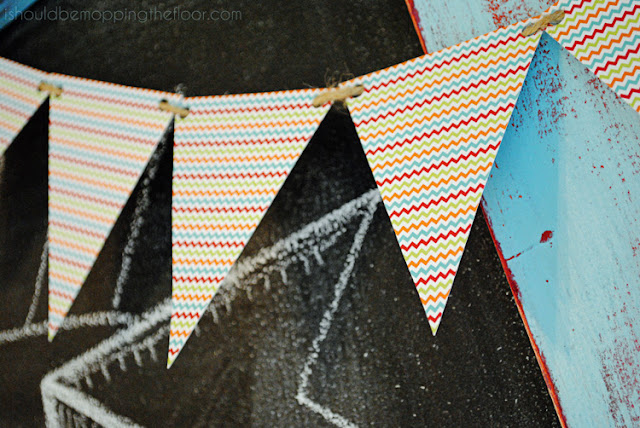
A fun, fresh and flirty banner is just the thing to dress up any decor.
Print. Cut. Hang. Enjoy.
#fridaysfreebie

Free Printable: Fun, Fresh and Flirty Banner #fridaysfreebie
I made this little ol' banner for my new chalkboard in the kitchen, 
{which I'll be posting about on Sunday}.
It's plain and simple. And yet...fun, fresh and flirty all at the same time.

Free Printable: Fun, Fresh and Flirty Banner #fridaysfreebie

Free Printable: Fun, Fresh and Flirty Banner #fridaysfreebie
The pennants are a little smaller than usual...but perfect to drape on a frame corner or where ever else you'd like.  
Free Printable: Fun, Fresh and Flirty Banner #fridaysfreebie
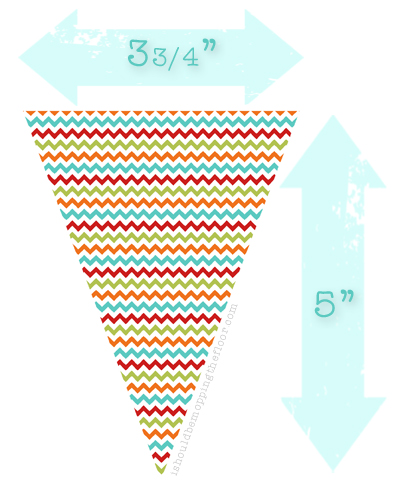
These are the dimensions of each pennant. 
Feel free to print as many as you'd like...it can be as long as you'd like it to be.
Click on the image below to begin download.

Free Printable: Fun, Fresh and Flirty Banner #fridaysfreebie

Some of my other free printables include:


Neglect your chores like me and don't miss a thing:


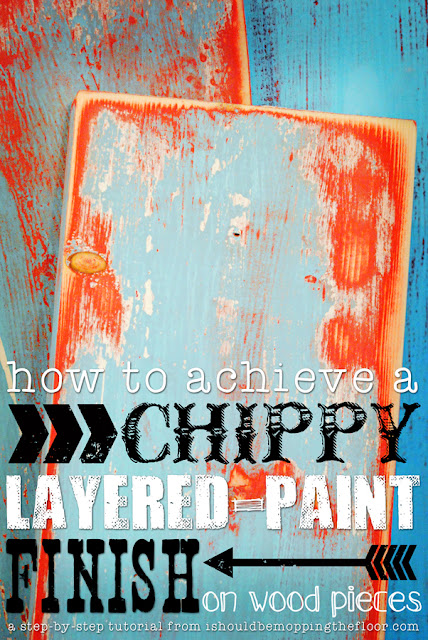
How to Achieve a Chippy Layered-Paint Finish on Wood Pieces

A chippy layered-paint finish can add character and age to any piece.
The methods shown below work flawlessly for me.

Two step-by-step methods for creating this layered paint look are in this post. Detailed photos make these easy tutorials to follow along and achieve the perfect finish.
I'm in the middle of a big ol' kitchen transformation. It's been a few years in the making, but I'm finally hittin' it hard big time. I've put together a lot of new accent pieces for the kitchen that have this chippy layered-paint finish that makes me go weak in the knees. There's two separate methods that I've used below.

Both of these methods start with a homemade chalk paint. This is my particular recipe that has worked well for me {pictured above}. It is thick, but I kind of prefer that. Feel free to play around with the measurements to achieve the consistency you're comfortable working with. The reason I like the thicker version is that I know it will adhere to pretty much anything in one coat.

METHOD #1>>>
Two step-by-step methods for creating this layered paint look are in this post. Detailed photos make these easy tutorials to follow along and achieve the perfect finish.
I like to start with a raw wood piece for this finish. If you're working with a piece of furniture, it's okay to start with the finish you have. If you'd prefer, you can sand it down to this raw state for an easier, more organic process. At least as organic as you can get when you're manufacturing a distressed look. There's a major oxymoron in there somewhere.  


Two step-by-step methods for creating this layered paint look are in this post. Detailed photos make these easy tutorials to follow along and achieve the perfect finish.
Schmear on a coat of the chalk paint. You're not going for perfection here...this layer will be buried under a few others. Just go for it and get it on there. After you've applied it...let your container of chalk paint sit out for a while to thicken up {an hour, give or take}. After it's thick, you may want to cover it so it doesn't get crazy thick. It's a fine line, I know this.

A note on color choices: you may want to try to get contrasting color layers so they show up really well in your finished piece. I did that on the other method I'll be showing you below.

Two step-by-step methods for creating this layered paint look are in this post. Detailed photos make these easy tutorials to follow along and achieve the perfect finish.
The chalk paint doesn't take too long to dry. I was working outside in the heat, so that did speed up the process. You can move on to this step about an hour after your chalk paint is applied.

On this particular piece {it ended up being a large frame that you'll see below}, I was pulling colors out of my curtain fabric that the finished piece sits next to. They're a bit random. But who doesn't love a good aubergine? Would you call this color grape or aubergine? Name that movie.

I used spray paint on just the edges of the piece. I wanted to deepen the red to grab that purple color and kind of "soak" it in. 


Two step-by-step methods for creating this layered paint look are in this post. Detailed photos make these easy tutorials to follow along and achieve the perfect finish.
After applying the spray paint and allowing it to dry {which literally takes like ten minutes in this part of the world}, use your thick, but not too thick, chalk paint and go back over the spray paint. You're just creating layers of fabulousness, friend.

Two step-by-step methods for creating this layered paint look are in this post. Detailed photos make these easy tutorials to follow along and achieve the perfect finish.
After that layer has dried, use your final color on the top. Again, it's best to have a lot of contrast in these colors so you really see all of the different layers of yummy aged chippy paint.

Two step-by-step methods for creating this layered paint look are in this post. Detailed photos make these easy tutorials to follow along and achieve the perfect finish.
When the paint is still tacky, use a paper towel to take off some of the top layer of paint. 

Two step-by-step methods for creating this layered paint look are in this post. Detailed photos make these easy tutorials to follow along and achieve the perfect finish.
After it has dried completely {you can see, it's now night time in my photo...I let it dry for several hours}, sand the piece until you get your desired level of chippiness/age.

Two step-by-step methods for creating this layered paint look are in this post. Detailed photos make these easy tutorials to follow along and achieve the perfect finish.
This is the finished piece on this one...I don't want to show you too much. 
I'm revealing it on Sunday with a super fun giveaway.
But you can see the reddish/purple hues peeking through. Fun, no?

METHOD #2>>>
Two step-by-step methods for creating this layered paint look are in this post. Detailed photos make these easy tutorials to follow along and achieve the perfect finish.
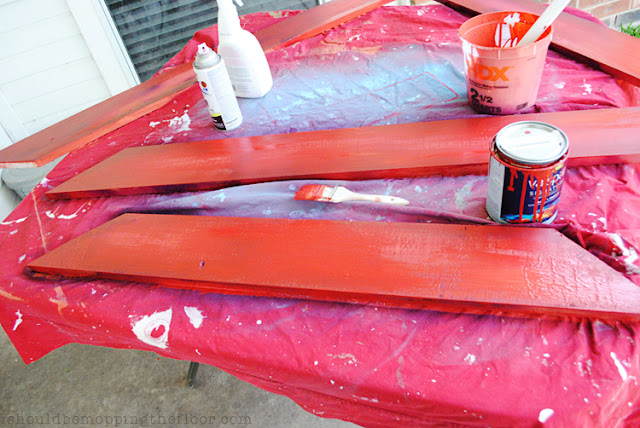
Again, start with your chalk paint mixture. I used red again. 
Apply it to the raw wood and let it dry.

Two step-by-step methods for creating this layered paint look are in this post. Detailed photos make these easy tutorials to follow along and achieve the perfect finish.
I used plain white acrylic paint on the next layer. It's such a nice contrast to the red. I just randomly painted areas with it. No rhyme or reason here. Allow to dry.

Two step-by-step methods for creating this layered paint look are in this post. Detailed photos make these easy tutorials to follow along and achieve the perfect finish.
Then the top coat again. This is my "Oops Blue" that I use er'where.
Allow this coat to dry.

Two step-by-step methods for creating this layered paint look are in this post. Detailed photos make these easy tutorials to follow along and achieve the perfect finish.
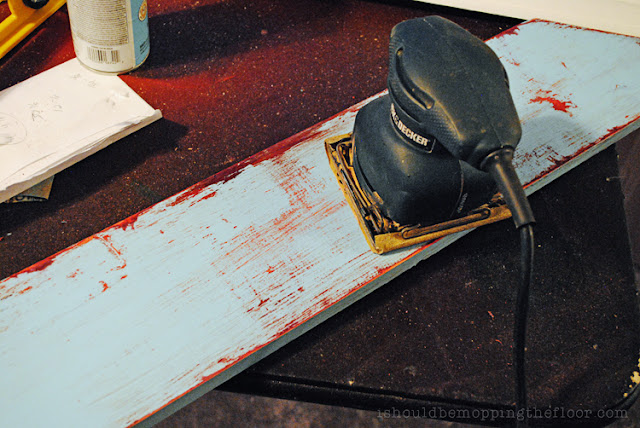
Then go at it with the sanding again. I can't tell you how much I recommend a palm sander. I use it constantly. Be prepared for the sheer amount of dust that sanded chalk paint will produce. Insanity.

Two step-by-step methods for creating this layered paint look are in this post. Detailed photos make these easy tutorials to follow along and achieve the perfect finish.
Here are the boards from this method. I love the white poking through.
I'm using these...well, I had a plan. And it tanked. Total project fail.
Stay tuned for where they turn up.

Two step-by-step methods for creating this layered paint look are in this post. Detailed photos make these easy tutorials to follow along and achieve the perfect finish.
This was another piece I did with a very loose version of method number one. I didn't do a top coat of blue. It is raw chalk paint on the final paint surface. Normally, you'd add wax to chalk paint if it's your top layer, but to keep the really aged look, I'm going to skip it for now. 

Two step-by-step methods for creating this layered paint look are in this post. Detailed photos make these easy tutorials to follow along and achieve the perfect finish.
This is where it started in the top pic. You know I popped some tags for this baby. 
{what, what...what, what?}
I plan to use it to hold cookbooks on some open shelving we'll be installing in the breakfast area.

Let me know if you have any questions on either method.
Do you have a favorite method for achieving a worn look with multiple layers of paint? 


Neglect your chores like me and don't miss a thing: